Saturday, November 20, 2010

Simple Secure Email

"The right of the people to be secure in their persons, houses, papers, and effects, against unreasonable searches and seizures, shall not be violated, and no Warrants shall issue, but upon probable cause, supported by Oath or affirmation, and particularly describing the place to be searched, and the persons or things to be seized."

- the fourth amendment to the United States Constitution

Despite the strained avowals by certain U.S. Supreme Court justices to hold that the Constitution is "dead" it is obvious to anyone with average intelligence that the intention of the fourth amendment is that citizens are allowed to have private correspondence, records, and possessions. It is unlikely that the eighteenth century authors and legislators ever conceived of records that existed in any form other than paper but today people communicate through a wide variety of methods. Unfortunately many of those methods of communication are insecure, including email. Currently email is transmitted through plain text, it is easy to capture this text as it moves across the internet from sender to receiver. To me it seems obvious that long ago it should have become standard for email to be encrypted for transmission (some proprietary services like Blackberry's "push email" encrypt the messages but an increasing number of governments are pressuring Blackberry to give them access to the secret keys that will allow the messages to be decrypted) but automatic encryption is unlikely to happen now for a variety of reasons.

This post will briefly outline a method for sending and receiving encrypted email. First it is important to understand that both the sender and receiver must agree to encrypt their email. If a sender wants to encrypt a message the receiver must have already provided a "public key" to the sender to allow the sender to encrypt a message. These instructions are meant for the everyday email user, it is not a technical discussion of encryption methods.

In this method the encrypted email can not be read in a web browser the way Yahoo Mail or GMail are using Internet Explorer or Firefox. Both reading and encrypting messages are done using the email application Thunderbird. Your computer will need to be connected to the internet for Thunderbird to access your email, but a web browser is not required.

You will need a flash drive (sometimes called a thumb drive). Thunderbird will be installed onto the flash drive.

First create an email account using GMail. If you know what IMAP is, how it works, that it is available on your preferred email service and you can configure it, feel free to use it. Otherwise GMail will be the simplest choice.

Second log into your new GMail account to configure IMAP. Click "Settings" in the upper right. Under Settings click "Forwarding and POP/IMAP." At the bottom is a section labelled "IMAP Access." Click "Enable IMAP" then click the "Save Settings" button.

GMail IMAP settings
GMail IMAP settings

Next download Mozilla Thunderbird Portable from PortableApps.com. Plug the flash drive into your computer and follow the installation instructions. Launch Thunderbird. It will prompt you for information about your email account.
Entering email information into Thunderbird.

It is most secure to uncheck "Remember password" but it is much more convenient to leave it checked. Remember that if you lose the flash drive anyone who finds it can use it to access your email account. Click the "Continue" button and the application will get the setup information for GMail. Click "Create Account" and Thunderbird will start and connect to your account.
Thunderbird has automatically configured the settings to get your Gmail.

The final step is to install Enigmail. PortableApps has provided a very simple install procedure and links to the software that is needed. Once Enigmail is added to Thunderbird you will need to setup encryption. Select "OpenPGP" then "Setup Wizard" in Thunderbird Portable. Follow the instructions, unless you know otherwise use the default values. To allow people to easily send you encrypted email you should allow your public key to be placed on a key server. If someone wants to send you email (or you want to send email to someone) the key server can be queried to see if a public key is available for an email address.

Create email normally, the first time a message is sent to a particular email address you will be prompted to select the public key of the email recipient. The outgoing message will be encrypted using the recipient's public key. If the recipient doesn't have a public key then the message cannot be encrypted and will be sent in plain text. When you receive an encrypted message you will be asked to enter your passphrase (created using the OpenPGP Setup Wizard) and the message will be decrypted and displayed.

Remember that wherever you store the private key created during the Setup Wizard must be kept safe. If someone gains access to the flash drive with Thunderbird Portable they can get your private key, and with it your encrypted email can be read.

In summary:

  • Create a GMail account.
  • Enable IMAP for the GMail account.
  • Install Thunderbird Portable on a flash drive.
  • Install OpenPGP and Enigmail on Thunderbird Portable.
  • Create a public / private key pair and share the public key on a keyserver.

Wednesday, November 10, 2010

Of Photo and Video Aspect Ratios (Surviving Vegas Movie Studio 10)

Creating "slideshows" of still photos for a video using Sony Vegas seems straightforward: round up some images using the Slideshow Creator, click the "Create" button and a slideshow appears in a video track. If only it were that simple.

Have you noticed that your photos, especially portrait oriented photos, are missing a lot of the picture? Have you thought about the aspect ratio of your output video? Vegas adds photos to a video track in a "crop to fill" manner, that means it will try to fill the output video frame with image data, even if a photo needs to be cropped to do so. For example this photo of three girls has a 3:2 aspect ratio. If it is placed into a Vegas project that has the "NTSC DV Widescreen" template set it will be cropped on the top and bottom to fit the 16:9 aspect ratio.

Original 3:2 aspect ratio photo

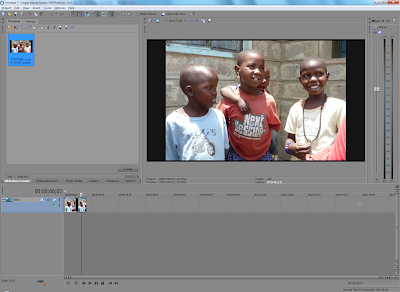
3:2 aspect ratio image added to widescreen DVD project
3:2 aspect ratio photo added to a widescreen DVD project, the photo is cropped at the top and bottom

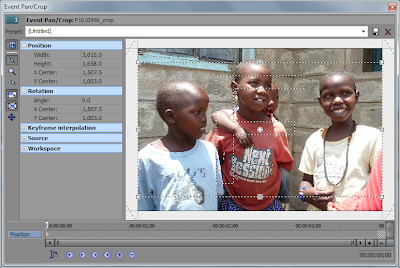
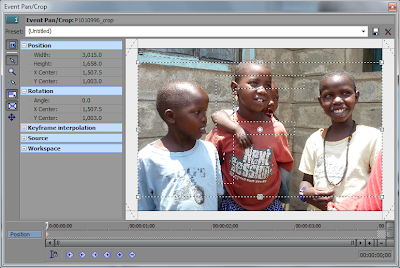
The screen capture below of the pan and crop tool shows how the original photo has been cropped. The tool can be used to manually "zoom out" and remove the cropping, but if there are a large number of photos in the slideshow doing that takes a long time.
3:2 aspect ratio photo cropped to widescreen DVD project shown in the pan and crop tool, dotted lines show the photo cropped at the top and bottom

The solution is to pad the images before importing them using the Slideshow Creator. When the photos are padded so that the resulting images have the same aspect ratio as the output video frame they will not be cropped. My personal preference is also to resize the images so that they have the same dimensions as the output video frame. This is all straight forward unless the images will be used in a widescreen DVD video. The frames of a widescreen DVD video have the dimensions 720x480 pixels, however the widescreen format is anamorphic, and the image displayed on screen will have the dimensions 873x480. So when padding photos for a widescreen DVD the dimensions of the padded image are 873x480.
Original 3:2 aspect ratio photo padded to 873x480 pixels

Photos can be padded and resized using any number of image editing tools. Irfanview can be used to resize the images, then in its Thumbnail viewer index prints can be created with one photo per page, no borders or image information, with the page size set to the dimensions of the output video frame. It's also possible to choose the color that will be used to pad the photos. Other applications can also be used to create the padded images including the use of Actions in Photoshop or scripts in Gimp. Once the images are padded they can be used as input to the slide-show.
3:2 aspect ratio photo with padding added to a widescreen DVD project, the photo is not cropped

The pan and crop tool shows that the image is no longer cropped.
Photo shown in the pan and crop tool has no cropping by default.

Of course whether your images are cropped or have padding is a personal preference. If you don't mind losing image data then accept the default crop or use the pan and crop tool to select the part of the photo that should be visible. However there is a glitch if you are going to output your video in different formats, like widescreen DVD and Blu-Ray. The aspect ratio of whichever Template is set on the project when the slideshow is created will be used to crop the photos when the Template is changed. The images below show the original photo added to a project with the "NTSC DV Widescreen" Template selected. Then the project template was changed to "HDV 720-30p". Now the photo is cropped at the top and bottom and padded at the top and bottom, this is the worst possible outcome.
Photo added to widescreen DVD project, then project changed to HD 720. Top and bottom of the photo are now cropped and padded

The pan and crop window shows what has happened, the frame being used to crop the photo has the widescreen DVD aspect ratio, the HD aspect ratio is not the same, so now the photo is cropped, then padded. The frame aspect ratio can be reset to the HD aspect ratio using the "Preset" list at the top of the window.
Photo added to widescreen DVD project, then project changed to HD 720. Top and bottom of the photo are now cropped and padded

The photo padded for widescreen DVD now has padding on all sides.
Photo added to widescreen DVD project, then project changed to HD 720. Top and bottom of the photo are now cropped and padded
Photo padded for a widescreen DVD project has had the project changed to HD 720. All sides of the photo are now padded

So when creating a slideshow where it is desirable to see the whole photo the best practices are: resize the photos to fit into the output video frame, if necessary pad the photos so that they have the same dimensions as the output video frame, create image files from the photos that match the output video frame size (i.e. don't use images created for a Blu-Ray slide show in a widescreen DVD slideshow).

But there is still so much more about slideshows to discuss, like markers, color correction, and pan and crop; those will all have to wait for a future post.